

There are many talented guides and operators offering tours where you get to take photos of the northern lights. Peter Rosén, Chad and Linnea Blakely, both in Abisko, and Sámi photographers Ylva Sarri and Anette Niia, who work around Kiruna and arrange photo safaris starting from ICEHOTEL in Jukkasjärvi, among other things. All of them, and many more besides, can help you shoot the Aurora Borealis. They also organise courses in northern light photography and very rarely give up before your dream has come true. Or as Peter Rosén says when I ask him about their ‘success rate’:
— For those who have stayed with us for at least three days, we actually have a success rate of 100 %. By then, everyone has seen the northern lights. But sometimes, we’ve had to drive almost all the way to Tromsø, Norway. Being mobile is a great advantage.

1. Clothes
Make sure you dress appropriately. You won’t want to interrupt a great northern-light photo session just because you’re outside in jeans and it’s starting to get cold. Many of the larger operators, those we mentioned earlier, have overalls and other warm items of clothing available to borrow/rent. But start from the inside. Leave anything made of cotton at the hotel. Merino wool for thermal underwear and socks, then layers of fleece or more wool, that way you won’t get cold. Never forget your hat – it helps you think while working with all the different camera settings.
2. Batteries
Batteries don’t cope well with the cold. They drain faster than normal. A good trick is to keep them in a zip-lock bag in the pocket of a wool shirt, for example. Bring an extra battery to keep warm this way all the time. I also usually bring a pair of thinner gloves. Then you can work with your camera in freezing temperatures without risking frostbite from an ice-cold camera body.


3. Condensation
A common problem when chasing the northern lights, or better and better shots, is that sometimes you move the camera and yourself between warm and cold environments, from the warmth of the car out into the cold and then back. Condensation occurs, and the camera lens might fog up. To avoid this, it’s a good idea to put the camera in a waterproof bag, then into the camera bag, which is cold too. They rarely have time to get warm during a short car ride to a new spot.
4. Equipment
When you take photos of the northern lights, you’ll work with long exposure times – simply because it’s the only way of capturing the light phenomenon. So you’ll need to rest your camera on a solid surface or use a tripod. The latter is preferable. Apart from that, you need a camera where you can set the ISO, depth of field, exposure and aperture.
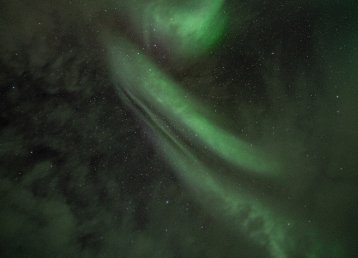
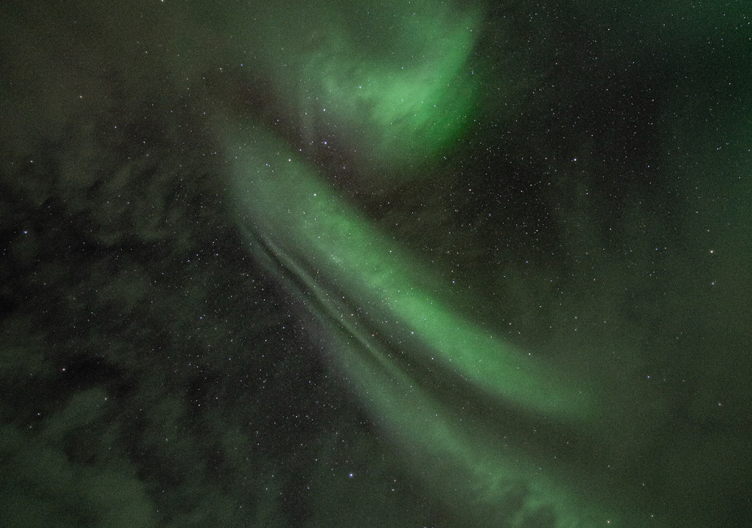
AURORA BOREALIS
The best chances of witnessing the northern lights are when you find yourself north of the Arctic Circle, at high altitude, preferably in open space without any other sources of light. Abisko National Park offers perhaps some of the best conditions in the world for anyone wishing to witness the northern lights.

5. Camera settings
A head torch is essential for this kind of photo sessions. It lets you set up the camera easily and quickly, choosing the settings you want. Ideally, use a wide-angle lens with a fast aperture, less than 4.0 if possible. Try to work manually with the camera. Set the aperture to the lowest possible, say 2.8. Set ISO to 800 and the exposure to 30 seconds. Mount your camera on a tripod and set the timer to take a photo after two seconds, or use a remote control. Then shoot a couple of photos at 30 sec., a couple at 25 sec., a couple at 20 sec. and so on. Somewhere you’ll find the ideal combination. If it’s too dark, you can raise the ISO to 1600.
6. Focus
Using the camera’s autofocus can sometimes be difficult in the dark. It’s best to set the focus manually. For the stars to show up sharp, just set focus to ‘infinity’. If you want to capture a house or other things nearby, ten metres and more should be enough for the entire picture to be in focus if you use a wide-angle lens. If that doesn’t work and you have to use autofocus, you can normally use something like the moon to get a sharp image. Many think that photos get sharper if you remove sky and UV filters as well.

7. Mobility
Peter Rosén mentioned this at the beginning of this story. Sometimes it’s good to be mobile. Snowmobile or car if you’re actually chasing the Aurora. But not only in that sense. Use a light, but sturdy tripod. Don’t bring all your cameras. Pack a couple of them, a few lenses and select the basic settings before you leave home. Be prepared to move when you feel that you’ve got the image. Find new angles, take photos of other photographers, try to come up with variations on the theme.
Short re-cap
- Focus on ‘Infinity’.
- Fast aperture, less than 4.0 if possible.
- Long exposure, say, 25 sec. and more.
- High ISO, start off at 800.
- Use a tripod!