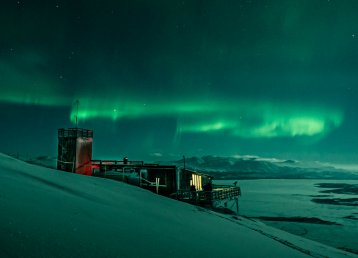


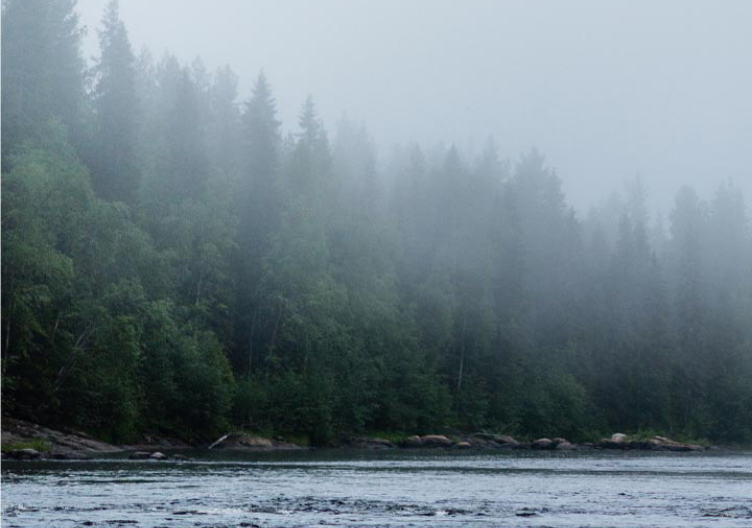
My location is slightly west of Jokkmokk. As I drove from Jokkmokk along the Karatsvägen road, not only did I travel towards Pärlälven – a mountain virgin forest nature reserve with a beautiful, magical primaeval forest environment – I also travelled into a landscape of darkness. A landscape with a night sky that is very little affected by physical pollution or light pollution. To experience a crystal-clear starry sky in this way is something very few are able to do. In today’s urbanised world with large cities that light up the sky for many, many miles in all directions, this is something unique and often forgotten.

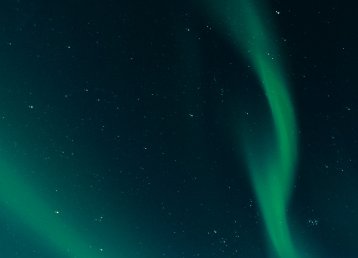
Our amazing night sky has more to offer than northern lights
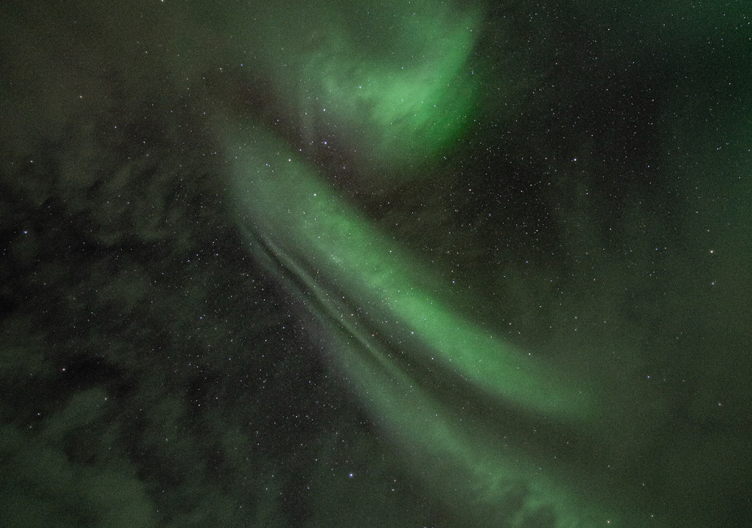
During the dark part of the year, we often get to enjoy incredible northern lights. Colourful shows created by charged particles from the sun accelerated by the Earth’s magnetic field towards the poles where they collide with particles in the upper atmosphere: the origin of the northern lights. But experiencing the starry sky on a clear night without moonlight is almost as fascinating. Standing in the dark, looking up and seeing the multitude of stars in the Milky Way stretching out across the sky. Discovering the tiny, blurred spot in the constellation Andromeda, the most distant object we can see with our naked eye – our spiral galaxy neighbour M31, the Andromeda Galaxy, located some 2.2 million light-years away. Marvelling at the tiny group of twinkling stars that make up the small open-star cluster The Pleiades. Or watching the mighty constellation Orion extend across the starry sky in wintertime.
I get an almost overwhelming feeling as I stand there in the dark. Not only does it remind you of your own smallness in relation to our universe. It also gives you a sense of contact with our own history – our human history. I stand there in awe and look at the same stars as our ancestors did. There is something profound and existential about this, and you get a sense of why the starry sky with its different phenomena has been so important to mythologies and creation stories.

The Milky Way
The Milky Way, spreading like a ribbon above me, is part of our own little island in the universe, our own spiral galaxy. In cosmological terms, it is a fairly ordinary spiral galaxy with a diameter of around 100,000 light-years. Astronomers estimate that it consists of between 200 and 400 billion stars. As our closest neighbour to the Milky Way, there is the Andromeda Galaxy, and together with some 40 other galaxies, we form a small neighbourhood in the universe in the form of the Local Galaxy Group, which in turn combines with other galaxy groups to make up the Virgo Super Group consisting of around 10,000 galaxies. The size is almost incomprehensible to a human being, but still, it is a mere suburb in the cosmic community.
In Swedish, the Milky Way is called Vintergatan, the Winter Road, probably derived from ancient Nordic mythology. The name is also found in Icelandic: Vetrarbrautin. It was believed that weather observers could predict the coming winter based on the “Winter Road” appearance. For example, in other languages, like English, the name refers to ‘milk’. This is probably derived from a story about the god Heracles in Greek mythology.
Photographing the Milky Way is a challenge to photographers interested in astronomy. However, the development of digital cameras with very light-sensitive sensors and other technical aids means that we can now take pictures that were very difficult to achieve just a decade ago. The conditions where I stand in the dark west of Jokkmokk are also conditions that are very difficult to find in a densely populated area.
As I set up my tripod and adjust the settings on my camera, I am standing on our tiny planet Earth, about 25,000 light-years from the centre of the Milky Way. Our home is located in the small Orion Arm, a smaller spiral arm between the larger Sagittarius and Perseus Arms. The starry ribbon we see across the sky is mainly made up of stars located in the galaxy’s disc, and the more central, star-dense parts with their large dust clouds are mostly visible during September and early October on our latitudes. That is when galaxy hunters have their peak season.


Starscapes – landscape photos with an astro-theme
Photographs of the Milky Way often end up in the Starscape category. It is a form of landscape photography where the night sky plays a main role in the composition. It differs from pure astrophotography, which is primarily about taking photos of specific objects such as planets, nebulae or galaxies. Photographing starscapes is something that most amateur photographers can do, but it still places some demands on both equipment and methods. So, what do you actually need?
Camera and lens
To take photos of the Milky Way and the starry sky in the simplest way possible, you need a digital DSLR camera, preferably a model that produces low noise at higher ISO speeds. You could use an advanced compact camera as well, of course, but if you want good results, you need a good camera.
Wide angles with focal lengths of around 12–24 mm are often used for starscapes. The reasons are many: a wide-angle gives you greater possibilities to compose an image with a water mirror or other items in the foreground. You also need to take the Earth’s rotation into account to avoid stars turning into dashes during the exposure – a wide-angle facilitates this. More on that later.
A tripod is a must
As the exposures are fairly long, you need a tripod and preferably a remote trigger. Exposure times are in the range of 20–30 seconds.
The Earth’s rotation and shutter speeds
So far, there are no surprises, really, but as the Earth rotates, we get an apparent movement of the starry sky that we must take into account. Our planet rotates around its own axis once every 23 hours, 56 minutes and about 4.1 seconds. When taking a picture of the starry sky, the stars will eventually be depicted as lines – the longer the exposure, the longer the lines. The nearer the equator, the longer the line. This means that as a photographer, there is a limit to the shutter speed you can use, and there is a simple rule: the rule of four hundred. This rule means that you divide the lens’s focal length by 400, which gives you the approximate maximum exposure time in seconds you can use before the stars start appearing as dashes. A lens with a focal length of 15 mm gives you 400/15 = 26 seconds.

ISO
Which ISO setting to go for depends largely on the camera you use – how sensitive it is to noise. I usually try to stay below ISO 3200.
Aperture
Generally speaking, you use the largest aperture of the lens. With my Irix 15mm f/2.4, however, I usually take it down to f/2.8 to improve edge sharpness, which can be a little soft using the largest aperture.
RAW
Shoot in RAW to get as much information as possible for post-processing of the pictures.
Focus
Setting the right focus in complete darkness is a challenge, to say the least. Autofocus does not work, so manual focus is a must. A tip is to focus on something distant beforehand, then lock the focal ring with a piece of tape, for example. Lenses with a real focus ring and hyperfocal scales are often easier to use, and some manufacturers have a little mark that lets you feel when the focus ring is set to infinite.
David’s tips
Equipment: DSLR with wide-angle and tripod.
Optional equiment: Motor drive, for example iOptron Sky Tracker, Vixen Polarie, Sky Watcher Star Adventurer.
Links:
Light Pollution Map – resource for finding areas with little light pollution.
Youtube channel for Starscape photography.
PhotoPills – a photo planning app.
Recommended programs:
Starry Landscape Stacker (Mac)
Starry Sky Stacker (Mac)
Deep Sky Stacker (Windows)
More on astrophotography in Swedish Lapland at David’s YouTube channel, @northernpanorama.


Composition and planning
The best time to capture the Milky Way is during dark evenings and nights with little or no moonlight. That does mean that it will be very dark, and planning photography can be difficult. A tip is to scout out a place in daylight and try to imagine the motive. There is a useful app called PhotoPills that facilitates planning.
A good DSLR camera, tripod, wide-angle, correct shutter speed, ISO, planning and composition – taking a picture of the Milky Way is not that difficult. There are also some additional methods and techniques that can be used to improve the result greatly.
Stacking and total exposure time (integration time)
Since the night sky is dim, the camera needs a lot of light. We are limited by the camera sensor’s abilities, the light sensitivity of the lens and the rotation of the Earth, making it impossible to use a too-long shutter speed. But there is a solution: take a number of exposures of the same scene, then add them together during post-processing. The method is called ‘stacking’. By taking, for example, 10 exposures that are 20 seconds long, we get a total exposure time (integration time) of 200 seconds. By using stacking as a method, we can amplify light-weak sky phenomena. Stacking also has another significant advantage: it is a very effective way of reducing noise in the final image. Stacking does require software. Adobe Photoshop has the function, but there are also dedicated programs for astrophotographers that can be used.
The attentive reader might wonder how to handle the Earth’s rotation when stacking pictures; the sky will move relative to the foreground during the exposures. There is just one solution here: the starry sky and the foreground must be masked. For Mac users, a program called Starry Landscape Stacker handles stacking and masking relatively automatically.
Trackers and mounts
For the even more advanced astrophotographer, various kinds of motorised trackers compensate for the Earth’s rotation. I often use an iOptron SkyTracker. I mount it on the tripod and then make a polar alignment. To put it simply: you set the right latitude and then aim it towards the Pole Star with the help of a small built-in telescope. The camera is then mounted on the tracker, and the tracker compensates for the Earth’s rotation. The risk of stars coming out as lines are significantly reduced, and the exposure time can be increased.
Astroscapes with motorised tracking are basically always composed. When tracking is turned on, the camera will be facing the same point in the sky. The stars will then be point-shaped and sharp, but the foreground will be blurred due to motion blur. This means you have to take at least one picture with the tracking off to get a sharp foreground.


Stacking and tracking combined
I usually combine the methods. I make an accurate pole setting and take at least 10 exposures of one minute each for the starry sky and then as many exposures with tracking turned off for the foreground. These files are stacked and individually processed, so I have one file with a sharp and contrast-rich starry sky but blurred foreground and one file with a sharp foreground but blurred stars, which are then combined and de-masked.
Post-processing
Astrophotography images and astroscapes with the Milky Way require some post-processing to let dim subjects be shown in their full glory. Here you may need to adjust white balance, contrast, clarity, local contrast and noise. There is quite a bit of information on YouTube, on the channel milkywaymike, for example.
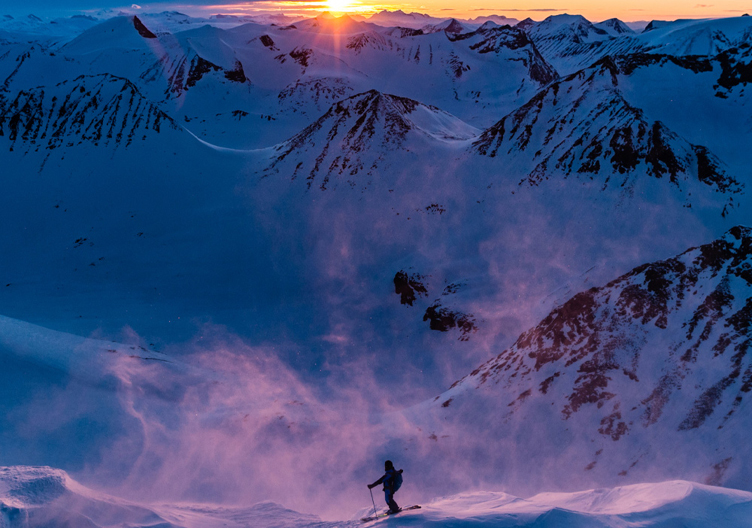
Prepare for a chilly night out
Last but not least, it is important to emphasise how important it is to be prepared for a chilly evening or night. Bring warm clothes, a hat and mittens. September and October are months where it can get quite cold at night. A head torch is a must.